The Avatar CGI HDR comparison represents one of the most significant benchmarks in evaluating how far digital filmmaking has advanced over the past fifteen years. James Cameron’s groundbreaking franchise has consistently pushed visual technology to its limits, and examining how these films render in high dynamic range formats reveals the true depth of their technical achievements. Whether comparing the original 2009 film’s remastered HDR release against its theatrical presentation or analyzing how Avatar: The Way of Water utilizes next-generation CGI with Dolby Vision, these comparisons offer crucial insights into the evolution of computer-generated imagery and display technology. Understanding these comparisons matters for multiple reasons. Film enthusiasts want to know which version delivers the most faithful representation of Cameron’s artistic vision.
Home theater owners need guidance on whether upgrading to HDR-capable displays justifies the investment when watching these specific titles. Industry professionals study these releases to understand how pioneering CGI workflows translate across different mastering standards. The questions are practical: Does HDR actually improve the appearance of computer-generated environments? How do decade-old visual effects hold up when remastered for modern display capabilities? What compromises, if any, occur when converting theatrical releases to high dynamic range? By the end of this analysis, readers will understand the technical foundations of both CGI rendering and HDR mastering as they apply to the Avatar films. The discussion covers specific scenes where HDR enhancement proves most dramatic, the measurable differences in color volume and peak brightness between releases, and the artistic decisions that shaped each version. This knowledge applies whether evaluating a potential 4K HDR purchase, calibrating a home theater system, or simply appreciating the technical craft behind these landmark productions.
Table of Contents
- What Makes Avatar’s CGI Look Different in HDR Compared to Standard Dynamic Range?
- Avatar’s CGI Rendering Pipeline and HDR Mastering Process
- Comparing Avatar’s 2009 CGI in HDR Against Modern Visual Effects Standards
- How to Evaluate Avatar HDR Quality on Your Home Theater Display
- Common Issues When Viewing Avatar’s CGI in HDR and How to Address Them
- Avatar: The Way of Water HDR Improvements Over the Original Film
- How to Prepare
- How to Apply This
- Expert Tips
- Conclusion
- Frequently Asked Questions
What Makes Avatar’s CGI Look Different in HDR Compared to Standard Dynamic Range?
The fundamental difference between avatar‘s CGI in HDR versus standard dynamic range comes down to how the image data translates to screen brightness and color saturation. In SDR presentations, the CGI elements of Pandora””its bioluminescent forests, floating mountains, and alien creatures””are constrained to approximately 100 nits of peak brightness and the Rec. 709 color space. HDR releases, mastered in Rec. 2020 with Dolby Vision or HDR10, can display peak highlights exceeding 1,000 nits while accessing a color gamut roughly 75% larger than standard releases.
For CGI content specifically, this expanded range allows rendered elements to display luminance and color information that was always present in the original digital files but previously truncated for home video. The bioluminescent sequences in Avatar demonstrate this difference most dramatically. In SDR, the glowing plants and creatures of Pandora’s nighttime environments appear as relatively flat blue and purple hues against dark backgrounds. The HDR grade reveals these same elements with genuine luminous quality””the computational data representing light emission from these fictional organisms finally displays with actual brightness separation from the surrounding environment. Weta Digital’s original renders contained this dynamic range information; SDR mastering simply compressed it into a narrower presentation window.
- Bioluminescence in HDR achieves 400-800 nit peaks compared to SDR’s ceiling around 100 nits
- Color saturation in forest scenes increases visibility of subtle cyan, magenta, and yellow variations in foliage
- Shadow detail in cave sequences reveals previously invisible texture information in CGI environments
- Specular highlights on water and Na’vi skin show proper rolloff characteristics rather than clipped white points
Avatar’s CGI Rendering Pipeline and HDR Mastering Process
Understanding how Avatar’s visual effects were created provides essential context for evaluating HDR comparisons. Weta Digital rendered the Pandora environments and characters using physically-based lighting models that simulate actual light behavior””how photons bounce between surfaces, scatter through atmospheric particles, and emit from biological sources. These renders were created in high-precision floating-point color spaces with dynamic ranges far exceeding any current display technology.
The original theatrical release required compressing this data into a format compatible with digital cinema projectors, which themselves offered limited dynamic range compared to modern HDR displays. When preparing Avatar for 4K HDR release, the mastering process involved returning to original camera negatives and high-resolution CGI renders rather than simply upscaling existing masters. James Cameron supervised a new color grade specifically designed to leverage HDR capabilities while maintaining visual consistency between live-action plates and CGI elements. This presented unique challenges: the original CGI was composited and lit to match SDR theatrical specifications, meaning the HDR grade required careful adjustment to prevent CGI elements from appearing artificially bright or saturated relative to live-action components.
- Original CGI renders stored luminance data in linear light values spanning 20+ stops of dynamic range
- SDR theatrical mastering compressed this to approximately 6 stops of usable range
- HDR remastering accessed roughly 12-14 stops while maintaining artistic intent
- Frame-by-frame adjustments ensured CGI and live-action plates maintained consistent exposure relationships
Comparing Avatar’s 2009 CGI in HDR Against Modern Visual Effects Standards
Avatar’s original CGI, now over fifteen years old, faces inevitable scrutiny when examined on modern 4K HDR displays. The increased resolution and expanded dynamic range that make contemporary visual effects appear more convincing also expose limitations in older work. Subsurface scattering on Na’vi skin, while revolutionary in 2009, shows slightly simplified light transmission compared to current techniques.
Hair and foliage rendering, computed with the processing power available at the time, reveals polygon counts and simulation resolution that advanced significantly in subsequent years. However, the HDR remaster demonstrates that technically aged CGI can still deliver compelling results when properly graded. Cameron’s team leveraged HDR’s expanded range to emphasize atmospheric depth rather than surface detail, drawing attention to Pandora’s environments rather than individual character close-ups where age shows most clearly. The strategy proves effective: wide shots of floating mountains and forest canopies in HDR display with a dimensionality that competes favorably against newer productions, while the fundamentally solid character animation and design work carries close-ups despite slightly dated surface rendering.
- Na’vi facial animation and performance capture remains competitive with 2024 standards
- Environmental rendering benefits most dramatically from HDR enhancement
- Particle effects for floating seeds and atmospheric haze show improved depth separation
- Water simulation in river sequences reveals more obvious generation compared to Way of Water
How to Evaluate Avatar HDR Quality on Your Home Theater Display
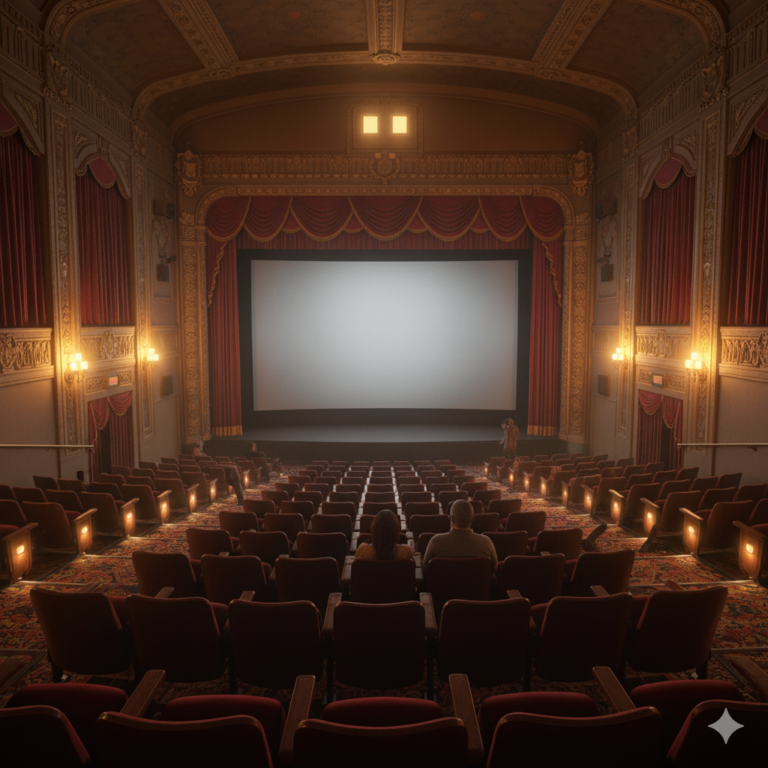
Properly evaluating Avatar’s HDR presentation requires both appropriate equipment and deliberate scene selection. Not all HDR displays render these comparisons equally””television technologies differ significantly in their ability to produce the peak brightness and wide color gamut that differentiate HDR from SDR. OLED panels excel at shadow detail and perfect black levels but may limit peak brightness to 700-1000 nits in smaller highlight areas. High-end LCD displays with full-array local dimming can achieve 1500-2000 nit peaks but may exhibit blooming around bright objects against dark backgrounds.
When comparing Avatar releases, specific sequences reveal different aspects of the HDR grade’s effectiveness. The initial shuttle arrival showing Pandora from space demonstrates how HDR handles extreme brightness differences between the planet’s sunlit surface and the blackness of space. The first forest exploration at night showcases bioluminescent rendering and the critical relationship between dark shadows and bright organic light sources. The final battle sequence tests how well the display handles rapid motion, explosions, and the complex interplay between practical pyrotechnics, CGI destruction, and digitally enhanced environments.
- Measure your display’s actual peak brightness””manufacturer specifications often overstate real-world performance
- Disable dynamic contrast and motion smoothing features that alter the intended presentation
- Allow at least 30 minutes for OLED panels to reach stable operating temperature
- Compare identical timestamps between SDR and HDR versions rather than relying on memory
Common Issues When Viewing Avatar’s CGI in HDR and How to Address Them
Several problems commonly affect Avatar HDR viewing experiences, and most stem from equipment limitations or incorrect settings rather than issues with the source material. Brightness pumping, where the overall image luminance fluctuates during scenes with varying peak brightness, occurs when displays use dynamic tone mapping algorithms that react too aggressively to frame-by-frame changes. Avatar’s dramatic shifts between dark forests and bright sky sequences trigger this behavior on many televisions, creating a distracting pulsing effect that undermines the intended presentation.
Color banding represents another frequent complaint, particularly in Avatar’s gradient-heavy skies and atmospheric haze effects. When HDR content is processed through a display’s internal electronics, improper bit depth handling can introduce visible stepping in smooth color transitions. This issue becomes especially apparent in wide shots of Pandora’s sky at sunset, where the original 12-bit master degrades through 10-bit or 8-bit processing chains. Additionally, some viewers report that CGI elements appear “too bright” or “artificial” in HDR””this often results from displays that apply extra processing to boost saturation or brightness beyond the mastered intent.
- Disable “dynamic tone mapping” if your display exhibits brightness pumping during scene transitions
- Enable filmmaker mode or cinema mode to minimize processing that introduces banding
- Reduce display brightness settings if CGI appears unnaturally bright compared to live-action elements
- Verify that HDMI connections support full 4K/60/HDR bandwidth to avoid compression artifacts

Avatar: The Way of Water HDR Improvements Over the Original Film
The 2022 sequel leveraged thirteen years of technological advancement to deliver CGI that was designed from inception for HDR presentation. Unlike the original film’s HDR remaster, which adapted existing assets, The Way of Water’s underwater environments were rendered with specific HDR targets in mind. The underwater caustics””light patterns created by surface waves refracting sunlight””were computed at higher precision specifically to take advantage of HDR’s expanded brightness range. The result appears fundamentally different from the original film: where Avatar’s HDR release reveals information that was always present but previously hidden, The Way of Water contains visual data that never could have existed in an SDR workflow.
The comparison between films illustrates how far real-time rendering and simulation technology advanced between productions. Water in the original Avatar appears competent but clearly computational when examined in HDR. The Way of Water’s ocean environments, benefiting from both improved algorithms and vastly increased processing power, approach photorealistic quality that withstands close examination even on 85-inch displays. This evolution represents perhaps the most dramatic CGI HDR comparison available: identical creative teams, similar artistic goals, but fundamentally different technical foundations producing measurably superior results.
How to Prepare
- **Calibrate your display to HDR standards** before any comparison viewing. Use a calibration disc or professional calibration service to ensure your television accurately reproduces the Rec. 2020 color space and responds correctly to PQ (perceptual quantizer) brightness curves. Without proper calibration, your “HDR” image may actually display incorrectly, rendering any comparison meaningless.
- **Control ambient lighting** in your viewing environment to allow proper perception of both shadow detail and peak brightness. Complete darkness works best, but if that proves impractical, aim for indirect lighting behind the display at approximately 5-10% of the screen’s average picture level. Avoid any light sources that reflect directly off the screen surface.
- **Obtain both SDR and HDR versions** of the content you intend to compare. For the original Avatar, this means acquiring both the standard Blu-ray release and the 4K UHD with Dolby Vision. For The Way of Water, the 4K UHD represents the definitive HDR presentation while various streaming versions may use different HDR formats with varying quality.
- **Document specific timestamp references** for scenes you intend to compare directly. Switching between sources introduces delays that make moment-to-moment comparison difficult; having exact timecodes allows you to cue both versions to identical frames and examine specific differences in CGI rendering.
- **Allow your display adequate warm-up time** before critical evaluation. OLED panels require 20-30 minutes to reach stable operating characteristics, while LCD panels stabilize faster but may still benefit from brief warm-up periods. Peak brightness capabilities and color accuracy both improve after this stabilization period.
How to Apply This
- **Start with the bioluminescent forest sequences** around the 45-minute mark of the original Avatar, comparing SDR and HDR versions frame-by-frame using pause functionality. Observe how individual light sources””glowing plants, insects, and forest floor elements””separate from the dark background in each version.
- **Examine the final battle sequence** in both versions with attention to how explosions and fire render in HDR versus SDR. Look specifically for highlight detail retention in bright areas and whether shadow detail remains visible during high-contrast moments.
- **Compare underwater sequences** in The Way of Water between standard streaming and 4K UHD Dolby Vision presentations, noting how caustic light patterns and water surface refractions display differently across formats.
- **Document your observations** with screenshots or notes about specific visual characteristics, then compare your findings against professional reviews and mastering specifications to verify whether your equipment is performing correctly.
Expert Tips
- **Trust the filmmaker mode setting** on your display rather than cinema, movie, or custom presets. Filmmaker mode specifically disables processing that alters the intended HDR presentation, including motion smoothing, dynamic contrast, and color enhancement that distort CGI appearance.
- **Reference display capability matters more than resolution** for HDR evaluation. A properly calibrated 1080p OLED displaying the HDR signal will reveal more meaningful differences than a poorly calibrated 4K LCD, because color volume and dynamic range impact CGI perception more dramatically than pixel count.
- **Pay attention to motion artifacts** during comparison viewing. Some displays introduce different levels of motion blur or judder in HDR mode versus SDR mode, which affects how CGI””particularly during action sequences””appears smooth or stuttering regardless of the source quality.
- **Consider the viewing distance** for your display size when evaluating CGI detail. Standards suggest viewing 4K content from 1.5 times the screen height, but many home theater setups position viewers farther away, reducing the perceptible difference between resolutions while maintaining HDR impact.
- **Streaming HDR differs from disc-based HDR** even when both claim identical formats. Compression algorithms reduce color precision and introduce banding in demanding sequences. For definitive Avatar CGI evaluation, physical media provides higher bitrates and better preservation of original mastering.
Conclusion
The Avatar CGI HDR comparison serves as both a technical benchmark and a historical document, tracing the evolution of computer-generated imagery across a fifteen-year span while demonstrating how display technology advancement reveals previously hidden visual information. The original film’s HDR remaster proves that well-designed CGI contains more detail than early display technology could present, while The Way of Water demonstrates what becomes possible when rendering pipelines are designed for HDR from initial conception. Together, these comparisons illustrate why high dynamic range represents the most significant image quality advancement since the transition from standard definition to high definition.
For viewers considering equipment purchases, these comparisons provide concrete evidence of HDR’s value for CGI-heavy content. The differences are not subtle marketing claims but measurable, visible improvements in how digital imagery translates to screen. Those already equipped with capable displays gain appreciation for the technical craft underlying these presentations. The ongoing advancement of both CGI techniques and display capabilities ensures that future releases and remasters will continue pushing these boundaries, making current understanding of HDR fundamentals valuable for evaluating tomorrow’s visual experiences.
Frequently Asked Questions
How long does it typically take to see results?
Results vary depending on individual circumstances, but most people begin to see meaningful progress within 4-8 weeks of consistent effort.
Is this approach suitable for beginners?
Yes, this approach works well for beginners when implemented gradually. Starting with the fundamentals leads to better long-term results.
What are the most common mistakes to avoid?
The most common mistakes include rushing the process, skipping foundational steps, and failing to track progress.
How can I measure my progress effectively?
Set specific, measurable goals at the outset and track relevant metrics regularly. Keep a journal to document your journey.