The Avatar CGI 4K vs 1080p comparison represents one of the most significant benchmarks for evaluating how cutting-edge visual effects translate across different display resolutions. James Cameron’s groundbreaking 2009 film and its 2022 sequel, Avatar: The Way of Water, pushed the boundaries of computer-generated imagery to unprecedented levels, creating entirely digital environments and characters that required years of development. When these films arrived on home video formats, viewers gained the opportunity to examine just how much detail survives””or gets lost””when downscaling from the native 4K Digital Intermediate to standard 1080p Blu-ray presentations. Understanding the differences between 4K and 1080p viewing of Avatar’s CGI extends beyond simple pixel counting.
The films contain some of the most complex digital assets ever created for cinema, including the bioluminescent flora of Pandora, the intricate skin textures of the Na’vi, and sprawling battle sequences featuring thousands of individual elements. Each of these components was rendered with meticulous attention to detail that may or may not be visible depending on your display resolution. This comparison matters for anyone investing in home theater equipment or trying to decide which format delivers the best value for experiencing Cameron’s vision. By the end of this analysis, you will understand the technical specifications that separate 4K from 1080p presentations, how Avatar’s specific visual characteristics interact with different resolutions, what hardware you need to appreciate the differences, and whether the upgrade delivers meaningful improvements to your viewing experience. This examination draws on the actual production specifications of both films, display technology fundamentals, and the specific encoding choices made for home video releases.
Table of Contents
- What Makes Avatar’s CGI Look Different in 4K vs 1080p Resolution?
- Technical Breakdown of Avatar’s 4K Ultra HD vs 1080p Blu-ray Encoding
- Viewing Distance and Screen Size Impact on Avatar 4K vs 1080p Perception
- How to Evaluate Avatar’s CGI Quality Across Different Resolutions
- Common Misconceptions About 4K vs 1080p CGI Rendering in Avatar
- The Future of Avatar’s Visual Presentation and Format Evolution
- How to Prepare
- How to Apply This
- Expert Tips
- Conclusion
- Frequently Asked Questions
What Makes Avatar’s CGI Look Different in 4K vs 1080p Resolution?
The fundamental difference between 4K and 1080p lies in pixel density. A 4K Ultra HD image contains approximately 8.3 million pixels (3840 x 2160), while 1080p Full HD contains roughly 2.1 million pixels (1920 x 1080). This four-fold increase in resolution allows 4K presentations to preserve fine details that get compressed or lost entirely at lower resolutions. For avatar specifically, this means the individual strands of Na’vi hair, the microscopic bioluminescent organisms covering Pandora’s vegetation, and the subtle facial performance capture details can be rendered with significantly greater clarity. Avatar was completed as a 2K Digital Intermediate for its original theatrical release, which means the native resolution of the finished film sits between 1080p and 4K.
However, the raw assets and textures created for the production existed at much higher resolutions, and the 4K remaster supervised by Cameron involved going back to these original elements to create a true 4K presentation. This process differs significantly from simple upscaling, where algorithms attempt to interpolate additional detail into a lower-resolution source. The way of Water, by contrast, was finished as a native 4K Digital Intermediate, making its Ultra HD release a direct representation of Cameron’s theatrical vision. The CGI elements in both films benefit enormously from increased resolution due to the nature of computer-generated imagery. Unlike film grain, which can obscure fine detail, CGI exists as mathematically precise data that scales predictably. The textures painted onto Na’vi skin, the geometry of Pandora’s floating mountains, and the particle effects of ash and water all contain information that becomes progressively more visible as resolution increases.
- Skin texture detail: Na’vi characters display visible pores, subtle color variations, and micro-wrinkles in 4K that appear smoothed over in 1080p
- Environmental complexity: Background foliage, rock formations, and atmospheric particles show distinct edges rather than blurring together
- Motion clarity: Fast-moving sequences retain sharper detail, reducing the smearing effect common in lower-resolution presentations
Technical Breakdown of Avatar’s 4K Ultra HD vs 1080p Blu-ray Encoding
The technical specifications of Avatar’s home video releases reveal significant differences beyond raw resolution. The 4K UHD Blu-ray utilizes HEVC (H.265) compression, a more efficient codec than the AVC (H.264) used on standard Blu-ray. This allows higher bitrates to be allocated to preserving fine detail, with the Avatar 4K disc reportedly averaging around 70-80 Mbps during demanding scenes. The 1080p Blu-ray, while still impressive by standard definition standards, operates at significantly lower bitrates that must make compromises during complex sequences. Color reproduction represents another substantial difference between formats. The 4K release features HDR10 high dynamic range, expanding the color gamut from the Rec. 709 standard used in 1080p to the wider Rec.
2020 specification. For Avatar’s bioluminescent environments, this translates to more saturated blues, greens, and purples that more closely match the theatrical presentation. The peak brightness capabilities of HDR also allow the glowing elements of Pandora to “pop” against darker surroundings in ways that SDR presentations cannot replicate, regardless of resolution. Frame rate considerations add another dimension to this comparison. While both versions of the original Avatar run at 24 frames per second, The Way of Water was shot and exhibited at high frame rates (48fps) for select sequences. The 4K home release preserves these high frame rate segments, whereas standard Blu-ray releases are locked to 24fps playback. This means certain action sequences and underwater photography will appear fundamentally different between formats, with the higher frame rate providing smoother motion but a distinctly different aesthetic that some viewers prefer and others find disconcerting.
- Bitrate allocation: 4K discs dedicate more data to preserving shadow detail and highlight information
- Compression artifacts: Banding in gradient skies and haloing around high-contrast edges appears reduced in 4K
- Audio specifications: 4K releases include Dolby Atmos object-based audio versus standard Blu-ray’s DTS-HD Master Audio
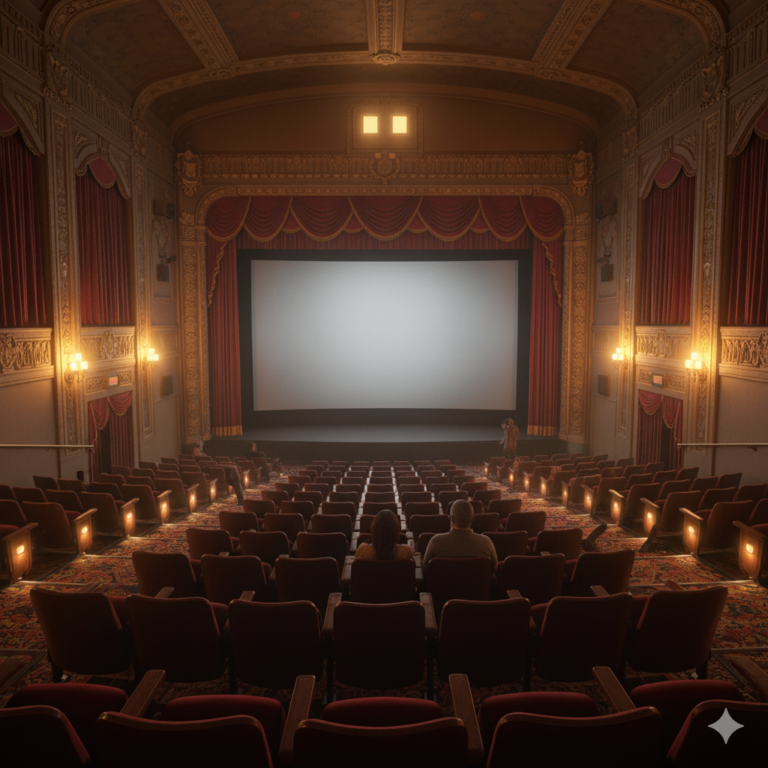
Viewing Distance and Screen Size Impact on Avatar 4K vs 1080p Perception
The perceptible difference between 4K and 1080p depends heavily on viewing conditions, making hardware considerations essential to this comparison. Human visual acuity limits our ability to distinguish individual pixels beyond certain distances relative to screen size. For a 65-inch display, the generally accepted threshold for perceiving 4K resolution improvements sits at approximately 8 feet or closer. Viewers seated further away may struggle to distinguish any meaningful difference between resolutions, making their viewing setup as important as the source material. Avatar’s visual design emphasizes depth and scale over fine surface detail in many sequences, which affects how resolution differences manifest.
Wide establishing shots of Pandora’s landscape benefit from 4K’s ability to render distant elements with greater clarity””individual trees in a forest, rock formations on distant mountains, or the shapes of flying creatures on the horizon. Conversely, close-up dialogue scenes where the camera focuses tightly on Na’vi faces show perhaps the most dramatic improvements, with performance capture nuances becoming visible that were previously lost to compression. Screen technology also influences the comparison. OLED displays with their per-pixel lighting control and essentially infinite contrast ratios can reveal shadow detail and subtle color gradations that LCD panels may struggle to reproduce regardless of resolution. The bioluminescent sequences in both Avatar films, which feature extreme contrast between glowing organisms and surrounding darkness, showcase OLED’s strengths particularly well. Viewers watching on high-end OLED panels report more significant perceived differences between 4K and 1080p than those using standard LED-backlit LCD displays.
- Optimal viewing distances: 55-inch display requires seating within 7 feet; 75-inch within 9.5 feet to perceive full 4K benefit
- Panel technology matters: Mini-LED and OLED handle Avatar’s extreme contrast ranges better than edge-lit LCD

How to Evaluate Avatar’s CGI Quality Across Different Resolutions
Evaluating the difference between Avatar’s 4K and 1080p presentations requires methodical comparison using specific reference scenes that highlight the resolution gap. The film contains numerous sequences that serve as effective test material, from the micro-detail of Neytiri’s facial expressions during emotional scenes to the macro-scale complexity of the final battle. Selecting appropriate reference material ensures you’re examining scenes where resolution actually matters rather than sequences where both formats perform similarly. The bioluminescent forest sequences in the first film offer excellent evaluation opportunities. These scenes feature thousands of individual glowing plants, floating seed pods, and luminescent insects, each rendered with distinct geometry and texture.
In 4K, individual elements maintain their separation even in dense clusters, while 1080p presentations tend to blur nearby objects together. Pausing on a frame and examining the mid-ground””neither the immediate foreground nor the deep background””reveals the clearest differences, as this zone typically contains the highest density of discrete visual elements. Water simulation in The Way of Water presents another revealing test case. The film’s underwater sequences required developing entirely new fluid dynamics rendering technology, producing some of the most photorealistic digital water ever created. The way light refracts through the water, the behavior of bubbles and particulate matter, and the interaction between submerged characters and their environment all benefit from increased resolution. Screenshots comparing identical frames from 4K and 1080p sources show notably different levels of texture in water surfaces and improved definition of subsurface scattering effects.
- Reference scenes: Chapters 8, 14, and 22 of the original Avatar provide excellent comparison material
- Screenshot analysis: Still frames reveal compression artifacts invisible during playback
- A/B testing method: Switching between sources on the same display eliminates hardware variables
Common Misconceptions About 4K vs 1080p CGI Rendering in Avatar
Several persistent misconceptions complicate discussions about Avatar’s resolution differences. Perhaps the most common involves confusion between source resolution and display resolution. Some viewers assume that because the original Avatar was finished at 2K, the 4K release offers no benefit over 1080p. This ignores both the remastering process, which referenced higher-resolution original assets, and the reduced compression artifacts that come with higher-bitrate 4K encoding. Even a 2K source displayed at 4K with superior compression can outperform that same source at 1080p with inferior compression. Another misconception involves the belief that CGI inherently looks “worse” than practical effects at higher resolutions. While this holds true for certain poorly executed visual effects work, Avatar’s CGI was created specifically for high-resolution exhibition.
The digital assets were built to withstand scrutiny at resolutions beyond what 2009 theaters could project, anticipating future format advancements. The textures, geometry, and lighting calculations contain information density that rewards increased resolution rather than exposing limitations. Viewers who claim Avatar’s effects look “more fake” in 4K are likely responding to the increased clarity revealing the stylized aesthetic choices rather than technical shortcomings. The relationship between frame rate and perceived resolution also generates confusion. High frame rate footage can appear sharper than standard 24fps material at identical resolutions because motion blur is reduced, allowing the eye to track moving objects more easily. Some viewers conflate this increased clarity with resolution improvement, leading to misattributed observations. When comparing Avatar’s 4K vs 1080p presentations, it’s essential to ensure both sources use identical frame rates to isolate resolution as the variable being evaluated.
- Source resolution myth: 4K encoding benefits extend beyond simple pixel count increases
- CGI scalability: Assets built for cinema-scale projection contain detail invisible on home displays until now
- Frame rate interaction: HFR sequences complicate direct resolution comparisons

The Future of Avatar’s Visual Presentation and Format Evolution
James Cameron’s stated intention to release additional Avatar sequels through 2028 ensures continued relevance for format comparison discussions. Each successive film has pushed technical boundaries further, with Avatar 3 expected to introduce even more advanced CGI techniques. The emergence of 8K displays and potential future home video formats raises questions about how these films will be re-presented to take advantage of increasing resolution capabilities. Cameron’s perfectionist approach suggests future releases will continue mining the original high-resolution assets for improved presentations.
Display technology evolution will also influence how Avatar’s CGI translates to home viewing. Emerging technologies like MicroLED promise OLED-level contrast with significantly higher brightness, potentially enabling HDR presentations closer to theatrical conditions. Wider adoption of Dolby Vision’s dynamic metadata could allow frame-by-frame optimization of Avatar’s challenging exposure ranges. These advancements may ultimately make the 4K vs 1080p comparison obsolete, replaced by discussions of 8K vs 4K or standard HDR vs advanced HDR implementations.
How to Prepare
- **Calibrate your display to baseline settings**: Before comparing formats, reset your television or projector to factory defaults, then apply basic calibration adjustments. Disable motion smoothing, noise reduction, and sharpening enhancements that can mask or artificially create apparent resolution differences. Use a calibration disc or built-in patterns to set appropriate brightness, contrast, and color temperature. This ensures you’re evaluating the source material rather than post-processing effects.
- **Verify your playback chain supports 4K HDR**: Confirm that your Blu-ray player, HDMI cables, and display all support 4K resolution at 60Hz with HDR10 or Dolby Vision. Check your player’s output resolution settings to ensure it’s not downscaling to 1080p. Use your television’s information display to verify the incoming signal matches expectations. A single weak link in the chain””an older HDMI cable, for instance””can reduce 4K to 1080p without obvious indication.
- **Position yourself at the optimal viewing distance**: Calculate the appropriate viewing distance based on your screen size using the THX or SMPTE recommendations. For most home setups, this means sitting closer than typical casual viewing positions. Mark the optimal position so you can return to it consistently during comparisons. Remember that perceived resolution differences diminish rapidly beyond the optimal distance threshold.
- **Acquire both format versions for direct comparison**: Rent or purchase both the 4K UHD and standard Blu-ray versions of Avatar. Streaming comparisons introduce additional compression variables that complicate analysis. Physical media provides consistent bitrates and eliminates network bandwidth as a factor. Having both discs allows rapid switching between sources on identical hardware.
- **Select specific comparison scenes in advance**: Identify 3-5 scenes that stress different aspects of the image””close-up faces, wide landscapes, fast action, and bioluminescent sequences. Note the exact timecodes so you can navigate directly to matching frames. Prepare to pause on specific moments that highlight detail differences rather than watching sequences at normal speed.
How to Apply This
- **Conduct side-by-side frame analysis**: Pause on identical frames from both sources and examine specific image areas systematically. Start with the center of the frame, then move to corners where lens characteristics and compression artifacts often manifest differently. Look for edge definition, texture clarity, and color graduation smoothness. Document your observations to prevent memory from distorting later comparisons.
- **Evaluate motion sequences at normal playback speed**: After static analysis, watch the same sequences in motion from both sources. Note whether the detail differences you observed in still frames remain perceptible during normal viewing. Fast-moving sequences may obscure resolution advantages, while slower scenes preserve them. This determines whether theoretical resolution benefits translate to practical viewing improvements.
- **Test at multiple viewing distances**: Watch the same reference scenes from your calculated optimal distance, then move back to your normal casual viewing position. Assess whether the resolution differences remain meaningful at typical viewing distances. This information helps determine whether the 4K investment delivers value for your specific setup and habits.
- **Compare across different content types within the film**: Evaluate whether resolution benefits apply consistently or vary by scene type. You may find that certain sequences show dramatic improvement while others appear nearly identical. This helps set appropriate expectations and identifies which aspects of Avatar’s presentation benefit most from 4K resolution.
Expert Tips
- **Focus on mid-ground detail for the clearest comparisons**: The middle distance in Avatar’s shots typically contains the highest density of distinct CGI elements. Foregrounds are often deliberately soft for depth-of-field effects, while backgrounds may be lower resolution by design. The mid-ground reveals resolution differences most consistently.
- **Watch for compression artifacts in dark sequences**: Avatar’s nighttime and interior scenes challenge video compression significantly. Look for banding in color gradients, particularly in the purple-blue skies of Pandora’s night. These artifacts appear more prominently in lower-bitrate 1080p encodes than in 4K presentations, sometimes making a bigger visual difference than raw resolution.
- **Don’t neglect the audio component of the comparison**: While focusing on video, remember that 4K releases typically include superior audio formats. The Dolby Atmos track available on Avatar’s 4K release provides overhead sound positioning and object-based audio absent from the standard Blu-ray. This contributes to overall immersion even if your primary interest is visual quality.
- **Allow your eyes time to adjust when switching between sources**: Visual perception adapts to what it’s shown. When switching from 4K to 1080p (or vice versa), spend at least 30 seconds with the new source before making judgments. Immediate comparisons can be misleading as your visual system may retain afterimages or expectations from the previous source.
- **Consider the theatrical experience as your reference point**: Both Avatar films were designed for cinema exhibition at resolutions and brightness levels exceeding home capabilities. If you’ve seen the films theatrically, use that memory as your benchmark. The format that more closely approximates your theatrical experience likely delivers the superior presentation, regardless of spec sheet numbers.
Conclusion
The Avatar CGI 4K vs 1080p comparison reveals meaningful differences that justify the format upgrade for dedicated viewers with appropriate equipment. The increased resolution preserves fine detail in the films’ groundbreaking computer-generated imagery, from Na’vi skin textures to the complex ecosystems of Pandora. Combined with HDR’s expanded color gamut and contrast capabilities, the 4K presentations deliver a viewing experience substantially closer to Cameron’s theatrical vision than standard Blu-ray can achieve. For viewers sitting at appropriate distances from sufficiently large displays, the improvement extends beyond technical specifications into tangible visual impact.
The value proposition depends heavily on individual circumstances. Those with older or smaller displays, casual viewing habits, or seating arrangements beyond optimal distances may find the differences difficult to perceive. However, for home theater enthusiasts who’ve invested in capable equipment, Avatar represents showcase material that demonstrates exactly what 4K resolution and HDR can accomplish. As display technology continues advancing and future Avatar installments arrive, understanding these comparison fundamentals positions viewers to make informed decisions about format purchases and equipment upgrades.
Frequently Asked Questions
How long does it typically take to see results?
Results vary depending on individual circumstances, but most people begin to see meaningful progress within 4-8 weeks of consistent effort.
Is this approach suitable for beginners?
Yes, this approach works well for beginners when implemented gradually. Starting with the fundamentals leads to better long-term results.
What are the most common mistakes to avoid?
The most common mistakes include rushing the process, skipping foundational steps, and failing to track progress.
How can I measure my progress effectively?
Set specific, measurable goals at the outset and track relevant metrics regularly. Keep a journal to document your journey.