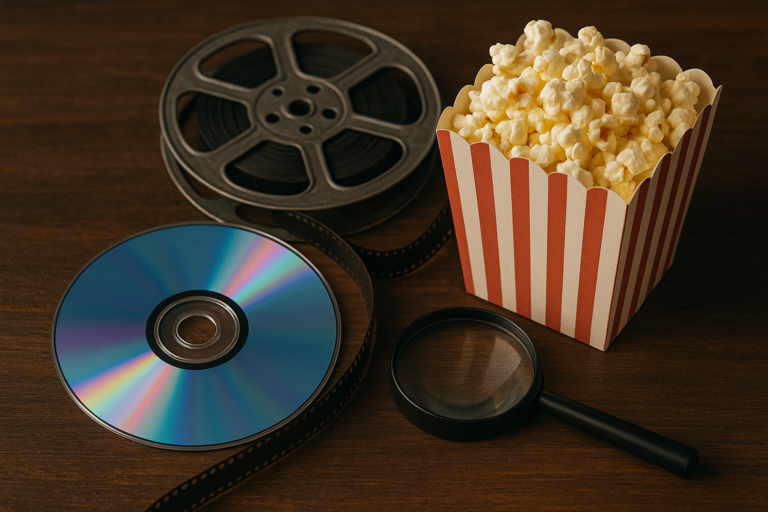
The phenomenon of Avatar CGI Disney Plus compression has become a heated topic among home theater enthusiasts and casual viewers alike since the groundbreaking film arrived on the streaming platform. James Cameron’s 2009 epic, which revolutionized visual effects and 3D cinema, represents one of the most technically demanding films ever created, with its lush bioluminescent forests, intricate alien creatures, and seamless integration of live-action and computer-generated imagery. When such a visually dense masterpiece meets the realities of streaming compression, the results have sparked widespread discussion about what gets lost in translation. The core problem centers on a fundamental tension in modern media distribution: Avatar contains an extraordinary amount of visual information per frame, from the countless floating seeds of the Woodsprite to the subtle light interactions on Na’vi skin, while streaming services must deliver content through bandwidth-constrained internet connections to millions of simultaneous viewers.
Disney Plus, like all major streaming platforms, uses aggressive compression algorithms to reduce file sizes to manageable levels. For most content, this compression remains imperceptible to the average viewer. For Avatar, with its unprecedented visual complexity, the compression artifacts can become noticeable enough to diminish the theatrical experience Cameron painstakingly crafted. By the end of this article, readers will understand exactly how video compression works, why Avatar presents unique challenges for streaming platforms, what specific visual degradations occur, and how to optimize their viewing setup to get the best possible experience from Disney Plus. The goal is to demystify the technical aspects while providing practical solutions for viewers who want to experience Pandora as close to Cameron’s vision as their home setup allows.
Table of Contents
- Why Does Avatar’s CGI Look Different on Disney Plus Streaming?
- Understanding Disney Plus Video Bitrate and Avatar’s Technical Demands
- The Science Behind CGI Compression Artifacts in Dense Visual Effects
- How to Optimize Your Disney Plus Settings for Better Avatar Playback
- Common Disney Plus Streaming Issues That Affect Avatar’s Visual Quality
- Comparing Disney Plus Avatar Quality to Physical Media and Other Platforms
- How to Prepare
- How to Apply This
- Expert Tips
- Conclusion
- Frequently Asked Questions
Why Does Avatar’s CGI Look Different on Disney Plus Streaming?
The visual difference between avatar in theaters and on Disney Plus stems from the fundamental mechanics of video compression and the specific challenges posed by Cameron’s approach to visual effects. Avatar was mastered at 4K resolution with high dynamic range and contains some of the most information-dense frames in cinema history. The Pandoran jungle alone features millions of individually rendered leaves, complex particle effects, volumetric lighting, and subtle color gradations that push compression algorithms to their limits. Video compression works by identifying and eliminating redundant information between frames and within individual frames.
Modern codecs like H.264 and HEVC analyze blocks of pixels, predict motion, and mathematically approximate areas of similar color and texture. This process works exceptionally well for most content because human perception has inherent limitations. However, Avatar exploits those perceptual boundaries with its hyper-detailed imagery. The bioluminescent elements create rapid brightness fluctuations that compression algorithms interpret as noise. The dense foliage creates what engineers call “high-frequency detail,” meaning rapid changes in color and brightness across small areas, which are particularly vulnerable to compression artifacts.
- **Macroblocking**: When bitrate allocation becomes insufficient, visible square artifacts appear in complex scenes, particularly during fast camera movements through the Pandoran forest
- **Color banding**: The smooth gradients of bioluminescent lighting can break down into visible steps or bands, especially in darker sequences where fewer bits are allocated
- **Detail loss**: Fine textures on Na’vi skin, individual strands in their braided hair, and distant foliage elements can appear smeared or lacking definition compared to higher-bitrate sources
Understanding Disney Plus Video Bitrate and Avatar’s Technical Demands
Disney Plus delivers 4K content at bitrates typically ranging from 15 to 25 megabits per second, depending on network conditions and specific content. While this represents a significant improvement over early streaming standards, it remains substantially lower than physical media alternatives. A 4K Blu-ray can deliver sustained bitrates of 80 to 100 megabits per second, meaning Avatar on disc contains roughly four times more data per second than its streaming counterpart. The technical specifications of Avatar compound these bitrate limitations.
The film was rendered at resolutions exceeding 4K for its visual effects, with some sequences processed at 6K or higher before being down-sampled for distribution. The original digital intermediate contains color information that exceeds what consumer displays can reproduce, and the dynamic range captures details in both shadows and highlights that compression algorithms must carefully preserve. When Disney Plus encodes the film, every decision about where to allocate bits becomes a compromise. Allocate too much to one challenging scene, and subsequent scenes may suffer. Use a constant bitrate, and some scenes will look pristine while others fall apart.
- **Peak bitrate versus average bitrate**: Disney Plus uses variable bitrate encoding, meaning the system attempts to allocate more data to complex scenes, but there are ceiling limitations that Avatar frequently exceeds
- **HDR encoding overhead**: Dolby Vision and HDR10 metadata require additional bitrate allocation, further constraining what remains for actual image data
- **Audio considerations**: High-quality Dolby Atmos soundtracks also consume bandwidth, creating additional pressure on video bitrate allocation
The Science Behind CGI Compression Artifacts in Dense Visual Effects
Understanding why CGI specifically suffers from compression requires examining how computer-generated imagery differs fundamentally from photographed footage. Traditional live-action footage contains inherent noise from camera sensors, slight imperfections in lenses, and organic variations in textures. Compression algorithms have been optimized over decades to handle these characteristics. CGI, particularly the pristine quality of Avatar’s Weta Digital work, presents mathematically precise imagery with perfect gradients, sharp edges, and details that extend uniformly across the entire frame. The discrete cosine transform at the heart of most video compression converts spatial image information into frequency components.
High-frequency details, those rapid changes between adjacent pixels that define sharp edges and fine textures, require more bits to encode accurately. Avatar’s jungle environments contain essentially infinite high-frequency detail. Every leaf edge, every fiber of plant life, every scale on a creature’s skin represents another demand on the encoder. When bit allocation becomes insufficient, the algorithm makes forced approximations. These approximations manifest as the softening, smearing, and blocking that viewers notice.
- **Temporal compression challenges**: Motion estimation algorithms assume smooth, predictable movement between frames. Avatar’s floating particles, swaying vegetation, and complex creature movements often defy these predictions, requiring more reference data
- **Chroma subsampling effects**: Streaming platforms typically use 4:2:0 color sampling, which allocates fewer bits to color information than brightness. Avatar’s saturated blues and greens can show subtle color shifts in heavily compressed areas
How to Optimize Your Disney Plus Settings for Better Avatar Playback
Viewers have several options to improve their Avatar streaming experience on Disney Plus, beginning with their account settings and extending to their home network configuration. The platform allows users to adjust data usage preferences, and selecting the highest quality option ensures the stream requests maximum available bitrate. This setting alone can make a noticeable difference, as Disney Plus may default to lower quality settings to improve buffer times on slower connections.
Network infrastructure plays a crucial role in sustained streaming quality. Disney Plus requires approximately 25 megabits per second for 4K HDR content, but this requirement assumes consistent, uninterrupted throughput. Wired ethernet connections eliminate the variability of wireless signals, preventing the adaptive bitrate system from temporarily stepping down quality during Wi-Fi congestion. Router placement, interference from neighboring networks, and the age of networking equipment all influence whether Avatar streams at its maximum available quality or continuously adjusts to compensate for network instability.
- **Disable data saver modes**: Check both app-level and device-level settings that might cap streaming quality
- **Use ethernet when possible**: The stability improvement over Wi-Fi often exceeds the theoretical speed advantage
- **Close background applications**: Other devices and applications consuming bandwidth create competition that triggers quality reduction
- **Check ISP throttling**: Some internet service providers throttle streaming traffic during peak hours, which can affect quality regardless of your connection speed
Common Disney Plus Streaming Issues That Affect Avatar’s Visual Quality
Beyond standard compression, several technical issues specific to streaming platforms can further degrade Avatar’s presentation. Adaptive bitrate streaming, while designed to provide uninterrupted playback, can sometimes react too aggressively to minor network fluctuations, temporarily dropping to lower quality encodes that take several seconds to recover. These quality dips often occur during the most visually demanding sequences, precisely when viewers most need the highest bitrate.
Display-side processing can introduce additional artifacts that viewers may incorrectly attribute to compression. Many televisions apply default sharpening, noise reduction, and motion smoothing that interact poorly with already-compressed content. Sharpening algorithms, in particular, can emphasize compression artifacts by enhancing the edges of macroblocks or making mosquito noise around high-contrast edges more visible. Motion smoothing, often marketed as motion enhancement or auto motion plus, can create the dreaded “soap opera effect” while also introducing interpolation artifacts in complex CGI sequences.
- **Buffering and rebuffering events**: Each rebuffering event typically results in the stream restarting at a lower quality tier, requiring time to climb back to maximum quality
- **Display processing interference**: Noise reduction designed for analog broadcast content can smear fine CGI details further
- **Incorrect HDR mapping**: Some displays improperly interpret HDR metadata, crushing shadows or clipping highlights in ways that exacerbate compression limitations

Comparing Disney Plus Avatar Quality to Physical Media and Other Platforms
The 4K Blu-ray release of Avatar remains the reference standard for home viewing, offering bitrates that streaming cannot match under current technology constraints. The disc version presents notably superior retention of fine detail in complex scenes, smoother gradient transitions in bioluminescent sequences, and more stable image quality during high-motion sequences. For viewers with appropriate playback equipment, the difference ranges from subtle to dramatic depending on display size and viewing distance.
Other streaming platforms face identical challenges with visually complex content. Apple TV Plus and Netflix have experimented with higher bitrate streams for premium content, but none currently offer quality parity with physical media for films of Avatar’s complexity. The economic realities of streaming bandwidth costs, server infrastructure, and the need to serve millions of concurrent viewers create unavoidable compromises. Studios and streaming services continue developing more efficient codecs and smarter encoding techniques, but the fundamental tension between file size and image quality remains an industry-wide challenge.
How to Prepare
- **Update your streaming device firmware**: Manufacturers regularly release updates that improve video decoding efficiency and fix bugs in HDR processing. Check for updates on your smart TV, streaming stick, or set-top box before watching.
- **Configure Disney Plus quality settings**: Navigate to app settings and select the highest available quality tier. On some devices, this appears under data usage or video quality preferences. Ensure no data caps or bandwidth limitations are active.
- **Optimize your network connection**: If possible, connect your streaming device via ethernet cable. If wireless is necessary, position your router to minimize distance and obstacles to the viewing device. Consider running a speed test during your planned viewing time to verify adequate bandwidth.
- **Calibrate display settings**: Disable unnecessary picture processing including sharpening, noise reduction, and motion interpolation. Enable filmmaker mode if available, or select cinema or movie picture presets that minimize artificial enhancement.
- **Prepare your viewing environment**: Reduce ambient light sources that can wash out dark scenes and mask shadow detail. Compression artifacts become more visible when viewers strain to see into dark areas of the image, so appropriate room darkening improves perceived quality.
How to Apply This
- **Start playback and let the buffer build**: Allow the stream to load for several seconds before beginning playback. This gives the adaptive bitrate system time to evaluate your connection and select the highest sustainable quality tier.
- **Monitor for quality drops during viewing**: If you notice sudden softening or artifact increases, pause briefly to allow rebuffering at higher quality. Note whether these drops correlate with other network activity in your home.
- **Use your display’s native apps when possible**: Built-in smart TV apps often receive optimizations that external streaming devices lack. Test playback quality between your TV’s Disney Plus app and any external devices to determine which performs better.
- **Consider time-of-day effects**: Peak internet usage hours, typically evenings in your time zone, can affect both your ISP’s network and Disney Plus server load. Morning or midday viewing often yields more consistent quality for bandwidth-intensive content.
Expert Tips
- **Viewing distance matters more than you think**: Compression artifacts become increasingly visible as screen size increases relative to viewing distance. The commonly recommended viewing distance of 1.5 times screen size for 4K content also helps minimize perception of compression limitations.
- **HDR is a double-edged sword for streaming**: While HDR provides superior highlight and shadow detail, it also demands more precise encoding. Some viewers find that SDR versions of heavily compressed content actually look better because the encode handles the reduced dynamic range more gracefully.
- **The first few minutes often look worst**: Disney Plus and other platforms typically start streams at conservative quality levels and ramp up. If the opening scenes of Avatar look particularly soft, wait several minutes before judging the overall quality.
- **Different displays reveal different artifacts**: OLED panels excel at black levels but can make color banding more visible. LCD panels may hide banding better but crush shadow detail. Understanding your display’s characteristics helps set appropriate expectations.
- **Audio sync issues sometimes indicate video problems**: If you notice audio drifting out of sync, your device may be struggling to decode the video stream properly. This can indicate insufficient processing power or memory, which may also manifest as increased visual artifacts.
Conclusion
The reality of Avatar CGI Disney Plus compression reflects the broader compromises inherent in streaming technology as it exists today. James Cameron created a film that pushes the boundaries of visual information density, and current streaming infrastructure simply cannot deliver that information intact to every viewer’s home. Understanding the technical factors involved, from bitrate allocation to compression algorithms to network variables, empowers viewers to optimize their setup and set appropriate expectations for what streaming can deliver.
For casual viewers, Disney Plus provides a convenient and visually impressive way to experience Avatar without the commitment of physical media purchases or dedicated playback equipment. The compression, while measurable and sometimes visible, does not prevent the film’s story, performances, and overall visual achievement from translating to home viewing. For enthusiasts who want to see every detail of Weta Digital’s groundbreaking work, the 4K Blu-ray remains the definitive home release. The streaming version serves as a testament to both how far compression technology has advanced and how much further it must go to fully capture cinema’s most visually ambitious creations.
Frequently Asked Questions
How long does it typically take to see results?
Results vary depending on individual circumstances, but most people begin to see meaningful progress within 4-8 weeks of consistent effort.
Is this approach suitable for beginners?
Yes, this approach works well for beginners when implemented gradually. Starting with the fundamentals leads to better long-term results.
What are the most common mistakes to avoid?
The most common mistakes include rushing the process, skipping foundational steps, and failing to track progress.
How can I measure my progress effectively?
Set specific, measurable goals at the outset and track relevant metrics regularly. Keep a journal to document your journey.